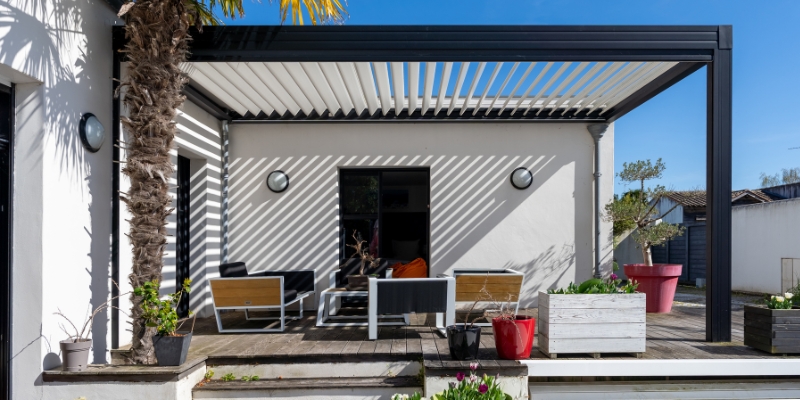
In the throes of uncertainty, grappling with the question of whether one can, indeed, attach a pergola to their dwelling or pondering the intricate mechanics of how to attach a pergola to a house?
If you find yourself in this dilemma, rest assured, that it is indeed feasible and possible to attach a pergola to your house, and within this guide lies your wellspring of knowledge on the subject.
We’ll walk you through the essentials, from safely securing wood posts to the appropriate stainless steel screws, and elaborate on methods for a seamless installation on concrete slabs and existing decks.
Ready to enhance your outdoor living experience? Let’s get started!
How To Attach Pergola To House in 6 Easy Steps
You can attach your pergola to your house by simply following these 7 easy steps.
1. Initial Measurements and Planning
Before you dive into your pergola project, careful planning and preparation are key.
Here are a few things necessary for planning and starting the construction of an attached pergola.
a) Scope Out the Area: Survey your outdoor area to decide the best place for your attached pergola. Make sure to measure the space to ensure your pergola’s posts will fit and won’t interfere with other structures like an outdoor kitchen or an existing patio.
b) Decide on Dimensions: Now that you know where your pergola will go, determine its size. How wide and deep do you want it? How tall should it be? These dimensions will guide the rest of your planning.
c) Sketch a Blueprint: A rough sketch can help you visualize the pergola and identify any potential issues. You don’t need to be an architect; a simple drawing with measurements will suffice.
d) Check Building Codes: Before moving forward, it’s essential to consult local building codes. You may need a permit to build a pergola attached to your house.
e) Markings: Use chalk or string to mark out the exact dimensions on your concrete slab or existing deck. This will give you a better idea of how your pergola will fit into your outdoor living space.
2. Collect All the Equipment, Tools, and Materials Needed
For a successful pergola project, having the right tools and materials on hand is crucial.
Here’s what you’ll need:- Heavy Duty Anchors or Stainless Steel Screws: For secure connections with the house that can withstand outdoor use.
- Roof Riser System or Ledger Board: Depending on how you want to install your pergola, if you are installing on the roof then you will need a roof riser system. Ledger board can be best used for attaching a pergola on the side walls of your house and will support the side of the attached pergola for smooth finishing.
- Circular Saw: For cutting wood to the right dimensions (if using wood pergola).
- Drill: To drill holes and secure screws.
- Joist Hangers: These will help in securing your cross beams.
- Concrete: If you’re not attaching the pergola to an existing deck, you’ll need concrete for the post holes.
- Level, Tape Measure, and Pencil: Basic tools for measuring and leveling.
3. Installing the Roof Riser System or Ledger Board as an Anchoring Point
So, you’ve completed the planning and initial preparations, and now it’s time to focus on setting up your anchoring point on the house for the pergola.
The roof riser system is ideal if you’re installing the pergola on the roof of the house.
Alternatively, a ledger board works well for attaching a pergola to a house with siding. Both serve as sturdy bases for your pergola project, ensuring both visual interest and utility in your outdoor living space.
a) How To Attach the Roof Riser System
- Unpack the Set: The roof riser system generally comes in a set that includes vertical posts, support beams, and lag screws.
- Align with Anchor Points: Place the roof riser in alignment with the marked anchor points on your roof after rooming shingles (if any).
- Drill Pilot Holes: Before securing anything, drill pilot holes into the roof at the marked points to make sure the screws will go in smoothly.
- Secure with Lag Screws: Using lag screws to secure the roof riser system to the roof trusses.
b) How to Attach the Ledger Board
- Measure and Cut: Cut your ledger board to fit the length of the pergola that will be attached to the house.
- Place Against Siding: Align the ledger board with the marked anchor points on the side walls. Ensure it’s perfectly level. It is recommended to cut back the vinyl siding and attach it directly to the home to secure the connection.
- Drill Pilot Holes: Just as with the roof riser, you’ll need to drill pilot holes into the house at the marked points on the house walls behind the siding.
- Attach with Expansion Anchors or Lag Screws: Secure the ledger board to your house using expansion anchors or lag screws. Make sure it’s firmly attached, as this will bear a lot of the pergola’s weight.
Note: Whether you’re using a roof riser system or a ledger board, the process of installing these anchoring points is critical for the stability and longevity of your pergola.
4. Installing the Posts on the Surface (Other Than the House)
After securely installing your roof riser system or ledger board as an anchoring point to your house, the next vital step in your pergola project is to set up the posts on the surface area.
Whether you’re building your pergola on a concrete patio, existing deck, or directly on the ground, this process will ensure that your pergola is well-supported and sturdy, adding both utility and visual interest to your outdoor space.
Make sure they are aligned with the roof riser system or ledger board attached to your house for a cohesive design.
Using a post-hole digger, dig holes to the depth recommended for your specific pergola, generally about 2 to 3 feet deep.
4.1 Setting Up Concrete Piers or Post Bases
If using concrete piers, prepare a concrete mixture according to the package instructions. Carefully pour the concrete into the holes, filling up to a few inches from the top.
Allow sufficient time for the concrete to set.
Place the post bases onto the dried concrete and anchor using anchor brackets or anchor screws, ensuring they are perfectly level.
What, If you want to anchor directly on thick pavers?
If you’re placing the pergola on thick pavers, measure and mark the points where the posts will go. Drill pilot holes into the pavers at the marked. Use anchor brackets to securely attach the posts to the pavers.
5. Attaching the Main Cross Beam and Louvers
Now that your posts are firmly anchored and set, the next crucial step in your pergola project is attaching the main cross beam and louvers to the roof riser system or ledger board.
5.1 Roof Riser System: Beams Carry the Pergola
If you’ve opted for a roof riser system, you’ll find that most pergolas require just two roof risers to adequately support the structure on the house side. These roof risers typically come with saddles on top designed to fit either a 4-inch or 6-inch main beam.
The saddles provide a stable and secure point for the pergola cross beam to sit on and attach to. It’s here that you’ll use heavy gauge galvanized nails or stainless steel screws to firmly attach the main beam to the roof riser system, then attach the louvers to this main beam.
5.2 Ledger Board: Attaching Using Anchor Brackets
If you’re using a ledger board as your anchoring point, you’ll follow a similar approach. The difference lies in the use of anchor brackets to attach the main beam to the ledger board. Make sure that the ledger board is securely fastened to the wall studs of your house using lag screws or expansion anchors before you attach the main beams.
Once you’ve verified that the ledger board is secure, you can use anchor brackets to attach the main beam to the ledger board. This will usually require pre-drilled holes and additional lag screws for added stability.
You can also directly attach the louvers to the cross beam.
For this, mark the spacing for the louvers on the beam and use weather-resistant screws or bolts to secure them in place. Ensure that the louvers are evenly spaced and parallel for both functionality and aesthetic purposes.
Regardless of the method chosen, always refer to the specific guidelines and recommendations for your pergola and ledger board system.
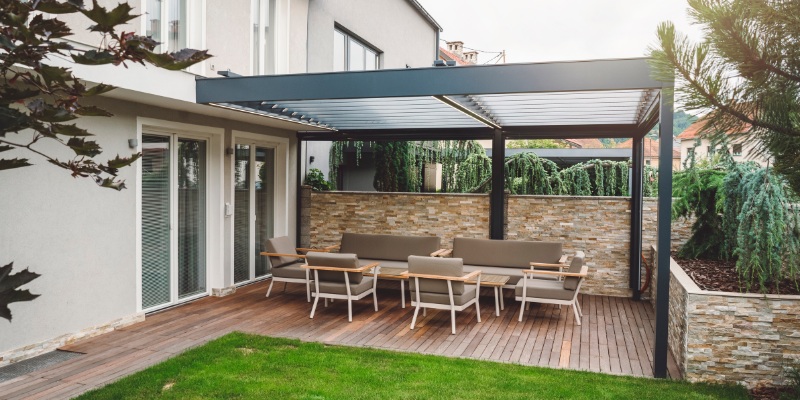
6. Finishing Touches
After diligently installing your roof riser system or ledger board, anchoring the pergola posts, and securing the cross beams, it’s time for the exciting part—adding the finishing touches to your DIY pergola project.
This step is crucial, particularly for wood pergola, giving your pergola a polished look, enhancing its lifespan, and making it a cozy, inviting space.
a) Painting or Staining the Pergola
Firstly, consider painting or staining your wood pergola to protect it from the elements and ensure longevity. If you’ve opted for pressure-treated lumber, staining can offer an additional layer to prevent rotting. Allow adequate time for drying before moving on to the next phase.
If you have opted for an aluminum pergola then you don’t need any staining, just give it a simple wash with water.
b) Adding Decorative Elements
For those who want to take their pergola to the next level, now is the time to add decorative curves to the ends of your cross beams or main beams.
This design flair can make your pergola look professionally built and adds a unique aesthetic appeal.
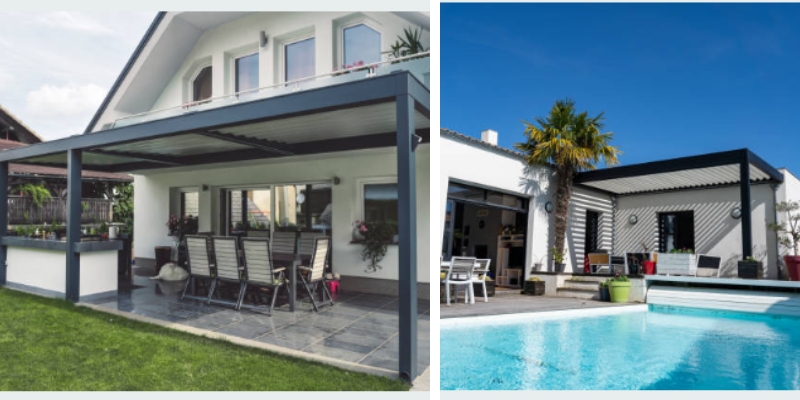
What Are The Added Advantages of Having an Attached Pergola?
The attached pergola apart from its allure and charm comes with a few added advantages of its own.
- Fewer Posts Required: One of the advantages of attaching a pergola to a roof riser or ledger board system is that it often requires fewer pergola posts compared to a standalone pergola. This not only saves on material costs but also makes for a more streamlined installation process.
- Reusability of Remaining Pergola Posts: If you’ve opted for an aluminum pergola kit, there’s the added benefit of reusability. With the existing two posts from the original structure, you can extend your pergola to another side. All that’s needed is to build extra beams, offering a cost-effective way to expand your outdoor space.
Final Thoughts
From initial planning and securing the roof riser system or ledger board to installing main beams and adding the final decorative touches, you’ve completed your DIY pergola project.
However, the work doesn’t end here.
One crucial step that should never be overlooked is safety testing. Take the time to double-check all fasteners, anchors, and lag screws to ensure they’re securely in place. If your pergola is going to be a part of your home for years to come, it needs to be as safe as it is beautiful.
Consider hiring a professional to inspect the structure to ensure that it meets local building codes and safety standards.
By assuring the secure fastening of each constituent component of your pergola, you not only safeguard your financial investment but also establish a secure milieu wherein your cherished family and esteemed friends can savor moments of leisure.
Thank you for joining us on this step-by-step journey to attach a pergola to your house. We hope this guide has been valuable in transforming your outdoor living space into an aesthetic yet functional extension of your home.